Help:Getting Started
Getting Started: A Simple Guide to Wiki Editing
Introduction
Welcome to the GSWiki, a collaborative effort combining player research and official information. Much of what can be found here has been curated from players who have taken the time to both gather the information and format it in a manner that breaks it down for everyone to use and understand easily. All players have a chance to contribute on various topics including general world information, mechanics, and roleplay.
Editing a wiki may seem overwhelming at first due to the amount of information available and sometimes the way it is formatted. New contributors are not expected to know everything from the start, and many are encouraged to create and revise articles to ensure the most up-to-date information is available for those who need it. It is important to note that perfection is not required, as the GSWiki is a continuous work in progress. If an article seems incomplete or has a poorly written first draft, other contributors can pop in and help it along.
Basics
Editing
Actual wiki editing is easy for the GSWiki and typically utilizes Wiki markup (alternately known as Wikitext or Wikicode). More information on this particular subject can be found in the style guide.
|
It is what takes this: This is an example of how <span style="color:blue">'''Wiki markup'''</span> works.
|
And makes it this: This is an example of how Wiki markup works. |
|
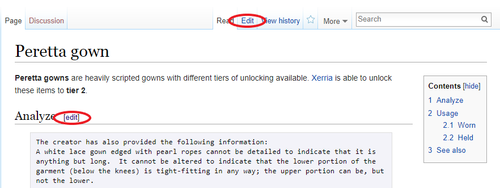
To begin editing, click on the Edit tab found at the top of the GSWiki page or on the blue link ([edit]) to the right of a section heading. This will open a new page with the editing environment for the current article. |
|
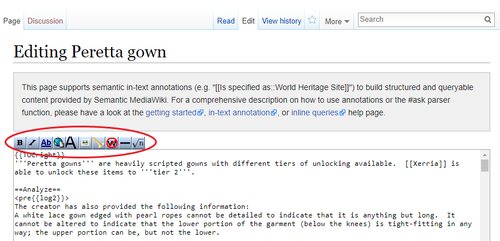
There are tools at the top of the editing environment for simple Wiki markup tasks. These include buttons for:
|
|
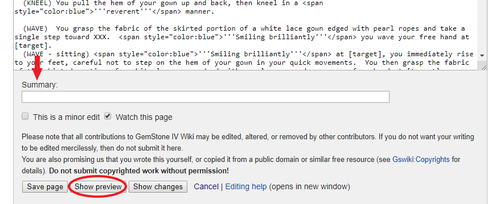
A best practice for editing pages would be to enter a summary of the edit or reason for the edit. If it is something as simple as fixing a typo, be sure to enter that as well as click the box next to This is a minor edit. Prior to saving the page, along with the edits, it is a good idea to click the Show preview button at the bottom of the screen. This will allow you to view how the page will look once saved, along with the editing environment. It is important to do this step as you will be able to see if any further edits need to be done without cluttering up the page history. It will also allow you to catch mistakes before other people can see them. |
Article Creation
Before creating a new article, it is important to verify the topic is not already covered in an already made article. Doing a thorough search prior to article creation can eliminate duplicate entries with information that may be outdated or conflicting.
Helpful hint: Checking out articles that are already created and formatted and clicking on the Edit tab at the top of the page can give you a peek at the Wiki markup code that was used. You can copy and paste that same code into your new article for quick and easy formatting. If doing this, make sure to exit out without editing by clicking the Cancel button at the bottom of the screen or the Read tab next to the Edit tab.
|
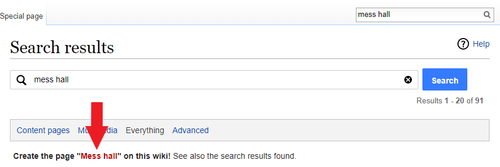
One way to start article creation is the same way you use to see if one already exists: doing a Search. |
|
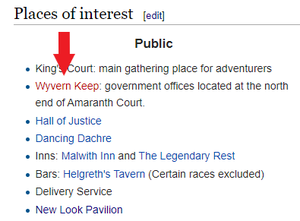
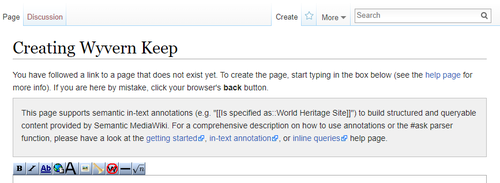
The other way is to create an internal link to a new article from an article already in existence by typing the new page name within double brackets ([[]]. Doing so will create a red highlighted hyperlink which will take you to the article creation page. |
Advanced
Templates
A template is a page within the a wiki that can be used throughout other articles. It usually contains repetitive material and can often be customized to fit various article needs. Some templates also utitlize other templates within them. Templates can be used to simplify text or table formatting and allow for additional parameters for further customization. Other templates are more complex and are coded to limit the amount of edits needed on articles that have them transcluded.
Most template pages on the GSWiki are found in the template namespace which means their page titles begin with "Template:", such as Template:Prettytable. A full listing of them can be found on the template category page. There are also additional namespaces for specialized festival shops, which include "EGShop" and "PSFShop".
Template Creation
Creating a template is done in the same way as creating an article page, while making sure to start it with Template:.
|
In the wiki search bar, type Template: by the name of the template. In this example, the template being created is for loresongs. |
|
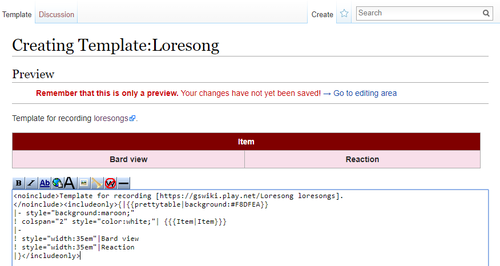
Clicking on the red hyperlink will open the editing environment for the new template page. |
|
Anything that is typed into the template's page will be included in the template and will be transcluded to any page the template appears on. |
|
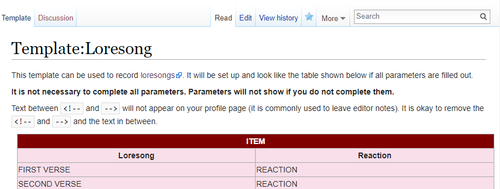
Saved template pages should include a summary of what the template does as well as instructions on how to use it. For more in depth or complex template coding, it helps to include a transcluded version of the template as an example. Utilizing <no include> will keep summaries or directions for setup and use from being added to articles on other pages. |
|
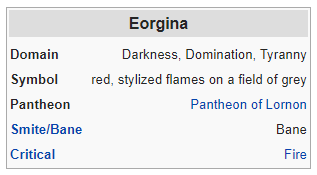
Templates can be fairly basic while others can be more complex and in depth. Most templates that are utilized by GSWiki editors have parameters that need to be filled in. The example template is one utilized for deity information which requires that the code is copied and pasted into the page it will appear on. For this type of template, additional information will need to be entered on each line. |
{{Deity
|domain =
|symbol =
|pantheon =
|relationships =
|smite =
|critical =
}}
|
Additional information on templates and creation can be found on wikipedia.org
Transclusion
Transclusion is the inclusion of a template or article section into an another article page.
|
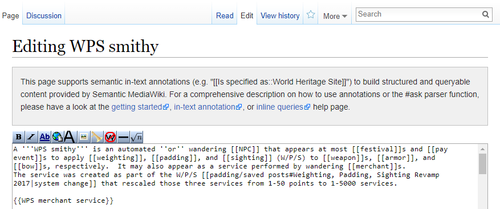
A template can be transcluded into an article by surrounding the template name with curvy brackets, {{}}. In this example, {{WPS merchant service}} is entered into the "WPS smithy" article page. This resulted in the Template:WPS merchant service being transcluded into the WPS smithy article. If any of the information in the template changes, it will automatically be updated in the article as well. This is an example of a template that requires no additional parameters. |
|
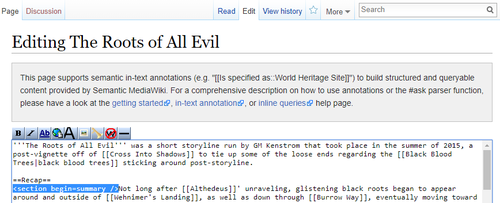
In order for an article section to be included into another article's page, the section needs to be marked as one. This will ensure that only the information within those specific parameters is transcluded into the other article. This can be done by naming the section and using <section begin= />. Marking the end of the section is done using <section end= />. In this example, the name of the section is "Summary" and the article is titled, "The Roots of All Evil". |
|
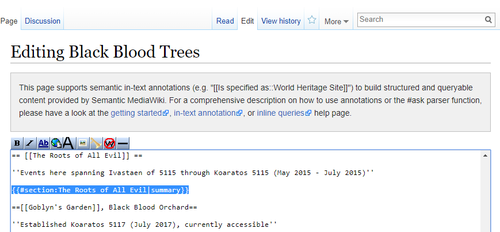
Once the section of the article has been marked, it can be transcluded into page of another article. This can be done by entering {{#section: }} along with the original article name and section title. In this example, we are transcluding the "Summary" section from The Roots of All Evil into the Black Blood Trees article. The specific format entered is: {{#section:The Roots of All Evil|summary}}. Be sure to pay attention to capitalization as it is case sensitive. |
